Tuesday, June 29, 2010

Home, Home on the Range!!!


Although we are not home....we were at The Wilds today ...a conservation park/breeding grounds for rare and exotic animals in Cumberland, Ohio. I am not able to crop or edit any of the photos, but will say I look forward to scrapping our vacation. Today's stop was the last of our planned places to see...the remaining is impromptu. It's late and everyone is sleeping around me, so I will quickly upload some images of our safari and catch some zzzz's myself.

As you can see, all kinds of creatures lurk in the tall grassess... too bad he was wearing red, as Kyle could have pulled off his sneak attack a bit more. We finished up our tour of The Wilds by stopping at the birding observation deck on a hill located off the highway leading to the main facilities. From the vantage point we could watch ospreys on the nest.  We witnessed one adult fly off the nest to a nearby pond, where it captured not a fish for lunch, but a twig for nest building. It looks like my pics could be decent despite the fast action, but until I can look, crop and view...sharing will come later on.
Unfortunately Abby was in a funk for a bit of the day, and I knew better than to ask her to pose for a photo. In hindsight, I wished I had forced it because even a photo with a frown is proof that she actually had the chance to go on safari at the Wilds at age 7...something she may not remember 12 yrs down the road. Kyle, however, obliged - and I took this shot of him at the Overlook Cafe in front of a patch of wildflowers. I love the Indian Paintbrush - gorgeous in its brilliant red and yellow!
We had PERFECT weather in the mid to high 70s today - the animals were moving around because it was not sweltering, as it was Sunday. It's been fun - we have some more stops, but I look forward to sleeping in my own bed again!

Happy creating - and making family memories!
Rita S.


Monday, June 28, 2010

BoBunny Petal Pushers Chest of Drawers

Today on the BoBunny blog you will get different ideas on reusing/recycling a number of common boxes often found around the home.
If you have ever hosted, or purchased, jewelry from one of those in-home party companies, you may have several cardboard jewelry boxes that have sliding sleeves. If you do, find a really good glue (I used E-6000 liquid glue/cement - fount at Michaels - this stuff glues wood, metal, and you're paper or cardboard is not going anywhere!) - and sandwich the boxes together.


Create a You’ve Got style Trinket Chest
Using BoBunny's new Petal Pushers line - I covered the boxes with patterned paper. As it turns out - a strip of 12" paper, cut 3 5/8" wide, fit EXACTLY around the sides and top of the boxes - how convenient! I used Doodles for the sides, and Whoosh! for the drawer fronts and backs, and also for the border strip along the bottom.

Now, I will share some close ups and tips so that you can make your own dresser-top set of drawers....
First, to create the drawer pulls, I dove into my "many many buttons" container and fished out multiple plain white buttons - unless I paint these or do something to make them more interesting...these just sit there. I decided to sandwich two together with KI Gloo and allowed them to dry. I then flossed three colorful, larger buttons found in the Petal Pushers and Sunkissed Buttons and Bling collections. Because of the floss, I wanted to ensure they would adhere strongly to the white buttons, and used the E-6000 cement again...and again to secure the 3-button sandwich, aka drawer pulls, to the center of each drawer.


I repeated the button sandwiching idea to create the legs for this project. It just looks a little nicer setting off the dresser top, don't you think? I have no idea where they came from, but I have a collection of about 30 bright pink buttons that all look alike and are the same size. They were perfect for the legs. It would be best to let your glue or liquid cement dry thoroughly in between layers. You may notice one set of stacked buttons has one slightly askew, as I was rushing the process so we could leave for vacation. A perfect stack is not critical, however, as long as each stack is the same height.

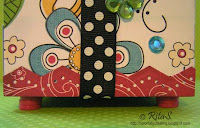
I wrapped the entire "paper chest" with black licorice double dot ribbon - I love the contrast with Petal Pushers. Using Flowers from the same line, I dabbed sparkle Mod Podge on the petals...one can never have too much bling, IMO, and especially on a fun girly-girl project like this one! (oh, and feel free to dab your buttons with Sparkle Mod Podge as well!) I love using the circle patterned side of the Whoosh! paper to punch out butterflies - making the sure the design is symetrical on each wing - very cool design and the paper did all the work!


I wanted the butterfly to hover over the flower. To do this I took a white piece of craft wire about 3.5" long, wrapped one end around the button in the center of the flower, and using a white, foam adhesive dot, attached the butterfly to the wire. I hope the close up photo helps you see how I did this.  To finish embellishing the box I adhered additional buttons and bling here and there along the sides and top of the chest of drawers.  Less than 6 months to Christmas, right? Checking one gift off my list... and I am certain she does not read this blog. (LOL)

I happend to buy a necklace for a teen a few months ago...so I am thinking a few chocolates in one drawer, perhaps a gift card in drawer number two, and the necklace in drawer number three - what could be more fun than to receive this fun and funky floral trinket box with a few trinkets inside?!

To recreate this project I used the following supplies:
BoBunny Petal Pushers: Whoosh and Doodles Patterned Papers, It’s A Girl Thing Cardstock Stickers, Buttons and Bling, Flowers, iCandy Brads
Sophie iCandy Jewels, Sunkissed Buttons & Bling
Licorice Double Dot Ribbon
Other:
DMC Floss
Sparkle Mod Podge
Black Pearl Gems by Mark Richards
Colorbox Chalk Ink-Black
Misc: Buttons
Adhesives: Mod Podge, KI Gloo, E-6000 Industrial Strength Clear Craft Adhesive

Let me know if you find some boxes and recreate this project on your own - I would love a link to see it when done! Happy creating!

Rita S.

Wednesday, June 23, 2010

Party Girl with BoBunny Jazmyne

Our neighbor girl is having her 11th birthday party today, and every girl likes a blingy birthday card, right? Today's card was created by two people. Our seven year old, Abby, started the card. She found Jazmyne papers on my table and asked if she could use the sparkly papers to make a card for one of her best friends. Of course I told her she could.

I was quite impressed - Abby had a plan and knew how she wanted the card to look. She had seen me tear paper plenty of times, and set about getting her paper to fit on the cardstock and tearing. I gave her some coaching as to which layer should go down first for a nice overlap.  She used a large scallop circle punch on the Noteworthy paper...and intended for it to hold her greeting. However, she used a purple pen, instead of pencil, and made a few mistakes in her well wishes. I told her it was not a big deal, but she was not happy about her spelling errors and gave up on that idea.

From the beginning Abby had wanted to use a girl Potty People chipboard shape by Magistical Memories - she loves those shapes. Without the medallion I decided to stamp "Party Girl" on a scrap piece of the Noteworthy to ground the potty girl to the background. To add in a little more "sparkly" paper I cut a strip of the Terrace pattern and used fuschia staples to set an accordian fold "ribbon".
Here is a tip for you... The Potty Girl was actually part of a twosome, the Potty Guy was used on a different project a while ago.  One arm was shorter than the other after having surgery, and being separated from her mate. To cover the unmatched arms I cut a dress out from a piece of scrap Botanical paper.

Abby and I both thought our Party Potty Girl could use a party hat, so I took a piece of scrap Noteworthy paper and fashioned a small cone. I took a small piece of Concord Double Dot Ribbon, and used a micro tip scissors to shred one end. I then used a glue dot to fasten this inside the cone, to create a tassel, and then used another glue dot to secure the cone shaped hat around the head.

A small flower and some gemstones were added for extra sparkle. I am sure our neighbor and friend will be delighted with her card. And I confess, I was quite delighted dressing up the Potty Girl shape with a dress and hat...who says you can have too much fun scrapbooking? Never! (LOL)

I punched a second scallop circle from the Noteworthy paper, and encouraged Abby to rewrite her message for the inside of the card, and suggested a pencil. A personal message from her to one of her BFFs will mean more than any stamped "Happy Birthday" inside.

Supplies Used
BoBunny Glitter Jazmyne, Wellspring, Terrace, Botanical, Noteworthy
BoBunny Double Dot Ribbon - Concord
Acrylic "Party Girl" Stamp - G Studio by Hampton Art
Gem Stickers: K& Co. and Recollections
Prima Flower
Colorbox Chalk Ink and Staz On Fuschia by Tsukineko
Making Memories Staples

If your child has a friend with a birthday coming up, be sure to let them use some of your supplies or scraps and encourage them in their creative efforts. I pray this card is one of many more that we will be making together. Happy creating!

Rita S.

Tuesday, June 22, 2010

One Wedding Card - Three Ways

Here comes the bride!! Summer...always filled with lots of weddings. Do you have some to attend this summer? If so, check out BoBunny's blog today for wedding card ideas. For my project today, I want to share one basic wedding card design...with three different takes on it. Because so many young couples text these days, I decided to use the "best friends forever" text message. The couple this card was made for both travel for work, they text often...and no doubt have "BFF'd" each other many times! (LOL)  If you have hopped over here from the BoBunny blog you are probably wondering what happened to the butterflies! I consider that a more traditional card...it's safe, everyone loves butterflies.

First, before you call me crazy...let me explain, there is a story behind my stick people bridge and groom.... This past weekend a friend of mine was married. Recently she celebrated a milestone birthday, and her sweet fiance lined up a surprise party. We all went to the Olive Garden, and then later played several games of Telephone Pictionary. My first time...and oh my, I have not laughed so hard in years!! I learned this is Katie's favorite game...she even has a bin in which she saves all the little game drawings - a great pick me up if she is feeling down, they make her laugh.
As you may surmise, this is a fairly fast paced game and there is no time for highly detailed drawings. Stick people have to suffice, and I am amazed at the creativity that can go into stick people! As I was thinking of ideas for Katie and Mike's card, it dawned on ...something Katie would really love... I asked my family to play Telephone Pictionary - with a wedding theme. Granted, there were only four of us, but the game of telephone still took the original idea on quite a tangent. Inside this wedding card is the Shimniok Wedding Edition of Telephone Pictionary. A simple gift, that took us 20 minutes to do, but now Katie and Mike will have personal art from each of us with their wedding in mind.

So stick people...it's an inside thing...very personal. I know the bride will LOVE it!

You may also wonder at the purple and orange color scheme...not what one might expect for a wedding card. However, when a couple gets married I figure out whom I should talk to to find out wedding colors. In this case, it was purple, with orange floral accents. Facebook made it quite easy for me to learn this time around. Of course there is lots of sparkle...Ranger Stickles in Citrus Orange accent the Prima daisies, and Sparkle Mod Podge by Plaid Enterprises was used on the purple flowers by BoBunny. I found Doodlebug heart shaped brads in orange - too perfect!


Note how I cut the leaves out from glitter Jazmyne paper - I used a micro tip scissors to give the leaves a bit of a jagged edge...as I find them in my backyard. It just makes them a wee bit different. As if they were not glittery enough, while adding green Stickles to the BoBunny chipboard swirls I decided to add more to the leaves as well. No such thing as too much sparkle, right? Especially for a wedding card!


If you like the more modern idea of using a "text message" on the front of a wedding card, but are not keen on stick people, well hey ...you all may be familiar with Potty People!! (LOL) For this example I simply coated Magistical Memories potty people with sparkle Mod Podge, and added a tulle veil behind the "bride".


A few more thoughts to share...when using paper doilies, look at both sides. I thought the backside of this doily was quite interesting, and featured it on the card as such. Because I wanted the white lace effect for a wedding card, I left it plain. But these little doilies, found at Michaels, are fun to mist, paint, ink, etc. I created my own Stick People Bride and Groom - - not bad, eh?!! Here is my tip...I punched circles that would fit inside the doily, and then used a pencil to sketch my couple. I believe it took me three times to get a couple I was happy with. I then scanned the image into the computer, and used Photoshop to trace over my art. This took a bit of time as I am terrible drawing with a mouse, and would love to have a WACOM tablet some day! But, through a series of filled polygon shapes, ovals, circles and lines - I managed a decent looking stick couple.

Supplies Used:
BoBunny Jazmyne collection: Amethyst, Jazmyne papers; Simply Beautiful Cardstock Sticker, Jazmyne Flowers; BoBunny Chunky Chip Swirls in Clover

Other:
Magistical Memories Potty People
Sparkle Mod Podge by Plaid Enterprises
Color Me Crazy Butterflies by Petaloo
Scribbles Paint by Duncan in Iridescent Mango
Red Orange Acrylic by Liquitex
Ranger Stickles in Orange Peel and Lime Green
Chipboard Letters by American Crafts Thickers
Doilies by Wilton (check out the cake decorating section!)
Pen - Sakura Black Glaze
Not grooving on stick or potty people? That's okay. Here is a close up of a pair of butterflies. The lighter orange is painted with Scribbles, intended for fabric which the butterflies are made of. The other was painted with a thicker viscosity paint by Liquitex. Both are covered with Sparkle Mod Podge and I used a Sakura black glaze pen to trace over the embossed swirl design.
To Mike and Katie - I wish you both the best!! You're wedding was fantastic and very YOU.
Here are a couple of pics when ya'll entered the reception room.


To my readers...if you want to see the card once more using butterflies, hop back over to the BoBunny blog wedding card post and check it out. Thanks for coming by!

Happy creating,
Rita S.

Saturday, June 19, 2010

Here Comes the Bride!!! (Telephone Pictionary Style!!)


This is the day that the Lord has made! Let us rejoice and be glad in it!!!
It's a gorgeous day for a wedding, and I am so excited for our friend Katie and her fiance, soon-to-be-hubby Mike. Today's post is dedicated to this amazing Christ-following couple. In a day and age where I begin to wonder if young couples marry anymore - these two are a shining example of the union God intended when He created marriage in Genesis.
In their honor, my family played wedding theme telephone pictionary earlier this week - Katie's most favorite game of all. She and Mike introduced me to this game, and now I look forward to playing it with neighbors and girlfriends in town. It is a hoot!!!

How Telephone Pictionary works... For the remainder of this post I will simply share examples from our game. There are 4 in our family so each telephone packet" had 4 sheets. I will say that this game becomes more of a riot when there are 8-10 people playing.

Play: At the same time each person writes a thought or phrase on the top sheet of their pieces of paper (everyone has the same number sheets of paper - one for each person playing). When everyone has written their words, the packet (of 4 sheets in our case) is passed to the right. The receiver looks at the phrase, places it to the back of the pile (as if you were flipping a spiral bound notebook), and draws what they read. This is not a contest for art - the drawing time should be about a minute to keep the game moving.
When that person is done the packet is passed right again, the receiver (2) looks at the picture, flips the picture to the back of the pile so no one else can see, and writes what they saw. Again, the packet is passed to the right (the last person in our family of 4), and the receiver draws what they read, and passes it to the starting position. The original writer of the phrase shares how their idea progressed (or perhaps regressed) with the group for a barrel of laughs.  Below - our pages dedicated to Katie and Mike.
Rita's idea:

----------------------------------------------------------------------
Abby's Idea:
-----------------------------------------------------------------------
Kyle's Idea:


-------------------------------------------------------
Jesse's Idea:


Remember...my images are left to right - it goes 1. words, 2. drawing, 3. words, 4. drawing. I have to smile at Abby's last drawing, her brother recently received a bull whip so he can practice his Indiana Jones moves...and likes to see how well he can decapitate dandelions in the yard. So hey, if you got any other ideas about the "whip" - scratch that thought! (LOL)

You may or may not guess, that in the last set by my husband, he was thinking of Ecclesiastes 4:12 "Though one may be overpowered, two can defend themselves. A cord of three strands is not quickly broken."  I am not sure why he did not write that down, but it is certainly a most appropriate thought for a wedding themed version of Telephone Pictionary. Relationships are hard, no doubt. I cannot even imagine having a relationship without having Christ in the center of it. A lasting marriage is not one of two loving hearts, but of three...husband, wife and the heart of Christ in the center. A marriage of three will last until the very end of time on earth...as our close friends Marv and Carol exemplified until his very end last week.  I wish for Katie and Mike...a marriage of three.
Congratulations Katie and Mike!!

Tuesday, June 15, 2010

Father's Day or Family Layout Ideas

Father's Day is coming up Sunday! Remembering dad with an 8x8 scrapbook album is a great way to preserve many years of memories. I thought I would share a few 8x8 page spreads I created for a friend, just in case you are looking for some ideas for  family page spreads.

The first spread uses BoBunny's Mama-Razzi line. The 6x6 cut outs available with almost every BoB collection make 8x8 page spreads a piece of cake. I apologize that I did not take close ups. The chipboard tab shapes are by Magistical Memories, simply inked and secured with antique copper brads, which look fantastic with Mama Razzi. For a masculine look, to celebrate the dad's in our lives, I distressed the paper edges with a craft knife and ink.
The second spread I thought I would share utilizes some very old product from years ago, I believe, in the days of ScrapTalk and serving on their design team! I remember how much I enjoyed this line of papers, the colors and patterns, and the puzzle pieces were so much fun. For a family page spread idea, use puzzle pieces (perhaps paint or cover pieces from an old puzzle with missing pieces) to create a "pieces of us" theme, and create a page that highlights gene traits that are predominant in your family.

The great thing about 8x8 albums is that the pages can utilize plenty of scraps, and if you are like me, there are plenty of those being "saved for just the right" project.

Hope you are leaving with some ideas, and thanks for popping in.

Happy creating,
Rita S.


Saturday, June 12, 2010

Pillars of Strength

Todays post is dedicated to Pillars of Strength. Maybe that should be a layout title....  I have posted so much about Marv these past months, but as you know, behind every good man is a greater woman. Carol has been amazing through all of this. She was dedicated to her wedding vows..."in sickness and in health" to the very end. Carol is an amazing woman, and I could not count how many times people said that to me yesterday. I heard words such as: unbelieveable, strong, gracious, amazing, beautiful...  I look forward to resuming bible study with her this fall, gathering for worship (although I am sure tomorrow will be difficult, our first Sunday knowing Marv will not be returning to his seat beside us), and perhaps Carol will even join me in the church choir later in the year.


Another man who has inspired me is Dick Hinrichs, Marv's very close friend. The two have been accountability partners for many, many years. First, I want to say that many of you may have prayed for Dick. I had sent out urgent prayer requests for him on one of his last mission trips, when we all thought he was going to die out in the middle of no where with no hospitals available to properly treat him. Obviously, Dick not only made it back, and recovered, but he has continued his mission trips despite a heart condition that worries both his wife and doctor.
Dick was one of the speakers at Marv's life celebration service. For years I have heard Dick call Marv "dad" and I always thought that odd, since both are grandpas. I never new why until yesterday. Marv was an adopted father to many, not just for me and my family, but for people of all ages who perhaps had no loving father growing up. Marv had lots of love to give and he gave it freely.

Another pillar of strength, for my very own family, is my husband Jesse. His faith is so strong, I have not seen him shed one tear, although he fully admits he misses the things he and Marv always did together, i.e. Monday evening bible study, Tuesday morning bible study, for a number of years - a Thursday morning study, and breakfast every Friday. As you can guess, my husband spent a LOT of time with Marv each week. Jesse's father passed away when he was only four, and I can see how Marv became his adopted dad as well. Marv helped Jesse's faith journey to grow as well, and my family has our own stronghold in the Word - my husband. He is steadfast, he is upright, and I admire him for all that he is: gentle, nurturing, loving, and most important, a living example of God's word in action.
And doesn't he like mighty dapper in that suit? As he watches his friend's casket being removed from the hearst, he knows this is not the end. In Marv's words, "there are no good-byes, only see-ya-laters".

I want to thank all of you who have been praying for our family and Marv during his illness. Those prayers have also given me strength, and I am so blessed to have you in my life.

God bless,
Rita S.

Wednesday, June 9, 2010

A Living Memorial Card


Our town is blessed to have the shining, trout "infested" jewel of the Black Earth Creek running through it. Near Crossroads, our favorite coffee house, is a trail.  Crossing over the bridge, our family gets to enjoy a stroll along what is part of the Ice Age Trail, along the banks of the creek where we sometimes throw in a line, although we have yet to catch a trout.
It is an easy path, well groomed, with blooming wildflowers, birds and butterflies flitting about, and the contstant, relaxing sound of the babbling brook. It is both a peaceful and joyous place to be, and it was used almost daily by our friends Marv and Carol, as they walked from their home nearby to Crossroads. In the latter part of his life, Carol drove them part way from home, parking at the trail head, they would walk the rest of the way. It kept Marv active, the fresh air was good for him, and it was a routine that was a part of their relationship up until the last few days of his life.
What better place, then, to plant a tree in memory of Marv? I am sure Carol will continue to walk the trail alone. Our family, as well as many others who knew Marv, will walk that easy trail. We will see a tree and a plaque with his name on it, and remember the man who touched so many lives. I called a number of Marv's closest friends and they were eager to give a living memorial in his honor. I wanted to create a special card, one that indicated what our gift was, in lieu of flowers.

I found the perfect embellishment in a tree shape by Magistical Memories. The three hearts not only symbolize the love we all shared, but it also reminded my of the Holy Trinity that was so much a part of Marv's life. I used my wet paint and ink drops technique to colorize the tree. I tore BoBunny papers from the Abbey Road line, and others, to create a landscape of park greens with a creek running through it. Because Marv led a life that produced much good fruit for the Kingdom, I added red gems to be the "fruit" of his memorial tree, even though the tree being planted is likely to be a locust or maple, as deemed by the parks commission.
I even doodled a bit inside, right along side the tree stamped with BoBunny acrylic stamps. I wrote a poem/message inside that described Marv's life and faith, and how similar it was to a tree. I hope you enjoy this card and perhaps it will give you an idea if one day you have a need for a living memorial card.  I shall leave you with my "ode to Marv", happy creating, and come back again.
-Rita S.


Monday, June 7, 2010

A Bittersweet Time

Marvin Leroy Knipfer
January 30, 1935 - June 7, 2010
I am happy for our dearest friend, Marv Knipfer, today…he went to be with his Father and has by now, probably had every unanswered question answered – or really, did he even care once he got to heaven? Marv was quite sure all our questions would no longer matter once we got there.

A while ago he shared a dream he had had with a vision of heaven…and right now his soul and spirit are living in that dream, I picture him looking down from on high to a waterfall below – Jesus is showing him around (guessing that the figure in Marv’s dream was He) – in the valley below flowers are blooming and there are countless people for as far as one could see. Today is the day he “woke up the happiest man alive” (Marv’s words), he had always wanted to die in his sleep.

Since Good Friday Marv has had a remarkable comeback- due in large part, we are sure, to the prayers of everyone who has been Marv’s prayer warrior. We THANK YOU for your prayers on his behalf.

The Lord blessed he and Carol with quality time as they resumed their walks almost daily, resumed attending worship services, and he became quite sharp in his conversation again, with a few not so good days here and there as expected. We too, were blessed – to be able to visit with Marv again and have him worship beside us. On Saturday Marv came down with what seemed flu-like, yet strangely different - now I realize it was probably his body shutting down.

Carol had said Marv did not really wake up this morning. She called Dr. J who came over to the house. His vitals were taken and Dr. J figured that sometime during the night Marv had had a massive heart attack. Marv had told his doctor a long time ago that when the time came he wanted to be told. Well, while Dr. J was there Marv came to, just long enough for Dr. J to tell him it was time. Carol got in one last hug and Marv took his last breath.
“But God will redeem my life from the grave, He will surely take me to himself.” Psalm 49:15

Our own family shared some time tonight to talk about Marv, share a favorite story, reminisce.  Abby took the news the best. The "best" meaning she had a moment of sadness, but took her dad's words to heart when he said we should celebrate Marv's life. We have a little Monarch caterpillar in a container munching on milkweed, Abby went over to check him out and announced that he was up on his hind legs "cheering for Marv!"  Our little girl is such a happy spirit... nothing seems to get her down for long!

I almost hestitated to tell the kids tonight as Kyle is quite nervous about having to give a presentation on water ecology tomorrow in front of his entire class block, I figured this news would not help. For sure I did not want Kyle to hear the news from someone else, plus his mom is a little weird with the red eyes tonight. (LOL) Kids are pretty smart.  His class bowls Friday and he has been looking forward to that, but he really wants to attend the funeral as well. I don't figure the timing is going to work out for that, and he will have to choose. I know that Marv doesn't even want a funeral - it is a LIFE CELEBRATION. It would be good for Kyle to hear that...that we celebrate the live of a believer who has gone to be with his Lord.  Please say a prayer for our son - he has never ever liked to be up in front of people. Marv will be looking down upon him, I am sure.

I have so many fond memories of Marv - and I will never forget the road trip he and I took to the Twin Cities to be trained to lead an Alpha course at our church. He shared so much about his past, his faith journey, and confident of the journey ahead as we were to lead others to Christ. Together we came up with some pretty hot ideas to light the Spirit under the seats of our congregation...but alas, our pastor told us the congregation was not ready for the two of us. (Imagine, we were not allowed to use that paper magicians use to create a quick little fire up on the altar as a visual for a talk...hmmmm, wonder why?) We were quite a team when it came to planning our little worship service called Inspiritus! He was my mentor, my "Eeyore" - had to get on his case when he put on that hat, my encourager, and my friend. Dang, I am going to miss that man, and while I shed a tear or several, he is wondering "what the heck girl, I am having a great time dancing up here!"